A camera lens faces dust, skin oil, rain spots, and tiny fibers every time it leaves the bag. These marks can soften contrast, create flare, and reduce detail in bright scenes. A Camera Lens Cleaning Kit provides the right tools for controlled maintenance, instead of relying on a shirt corner or household tissue.
Roger Cicala, founder of LensRentals and an experienced camera equipment technician, has shared a practical warning: “Cleaning a lens is often more dangerous than leaving a little dust alone.” That idea deserves attention. A blower can remove loose particles without touching the glass. A soft brush may lift stubborn dust. A microfiber cloth and suitable cleaning solution can handle fingerprints carefully. Small steps matter.
Do not rush it.
A proper kit also improves consistency. You know where the blower, cloth, and cleaning fluid are stored. You can inspect the front element under a desk lamp before wiping it. This simple habit prevents grit from dragging across the coating. Still, a cleaning kit is not magic. Excessive wiping may cause scratches, residue, or unnecessary coating wear. I have sometimes cleaned a lens too quickly, then noticed a faint streak near the edge. That mistake changed my routine.
The best reason to use a Camera Lens Cleaning Kit is controlled care. It protects image quality, supports longer equipment life, and gives photographers confidence in changing conditions. Good maintenance remains gentle, limited, and observant. Sometimes, leaving the lens alone is the professional choice.
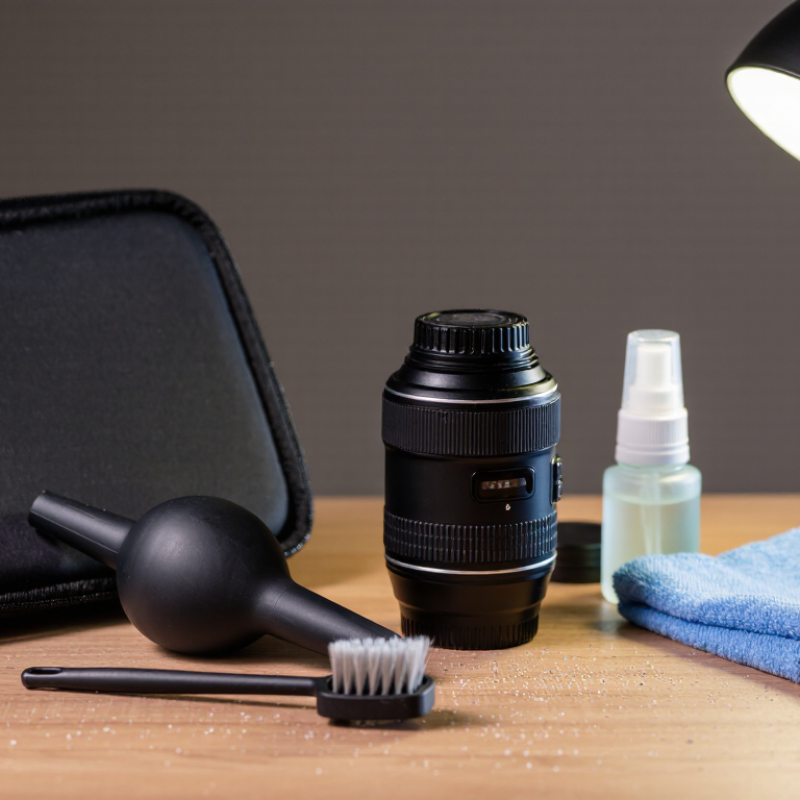
A camera lens cleaning kit is a small, controlled system for removing dust, fingerprints, and light moisture from optical surfaces. It usually includes an air blower, a soft brush, microfiber cloths, cleaning fluid, and lens-safe tissues. Some kits also contain sensor swabs, but these require greater care and should not be confused with ordinary lens tools.
The air blower should come first. Rubbing visible grit can create fine scratches. I have learned this the hard way, after wiping a lens too quickly outdoors. A brush lifts loose particles. A lightly moistened tissue then removes oily marks. Never flood the glass. Apply minimal fluid to the tissue, not directly onto the lens.
The Camera and Imaging Products Association reported more than eight million digital cameras shipped worldwide in 2024. Its annual statistics also continue to track interchangeable-lens cameras as a major product category. That active equipment base makes basic optical maintenance practical, not decorative. Yet cleaning kits are not repair tools. They cannot remove coating damage, deep scratches, or fungus inside a lens.
Independent testing guidance from the International Organization for Standardization emphasizes repeatable imaging conditions, where surface contamination can affect image evaluation. A fingerprint may appear as haze around bright highlights. Dust may become obvious at narrow apertures. Still, cleaning too often can be a mistake. I now inspect under a small LED light first. Clean only what is actually present.

A camera lens cleaning kit combines tools designed for different types of surface contamination. An air blower and soft brush are intended for loose dust, while lens-safe cleaning solution and a microfiber cloth help remove fingerprints, smudges, and residue. Removing loose particles before wiping helps reduce the risk of scratching the optical surface.
Chart key: 1 means the component is commonly intended for that cleaning task; 0 means it is not the primary tool for that task.
Why Use a Camera Lens Cleaning Kit?
Camera lenses need specialized cleaning because their coatings are delicate and easy to damage. Dust may look harmless, but tiny particles can scratch glass during wiping. Household tissues can leave fibers behind. Some cleaning liquids may also weaken protective coatings or leave cloudy marks.
A proper kit usually includes an air blower, a soft brush, microfiber cloth, and suitable lens cleaner. Each tool has a specific purpose. The blower removes loose dust without touching the surface. The brush handles particles around the rim. A lightly dampened cloth then removes fingerprints and grease. I once wiped a lens too quickly and spread an oily mark across the entire front element. It looked clean at first. It was not.
Tips: Hold the lens under soft light before cleaning. Blow away grit first. Never rub visible particles across the glass. Use very little cleaning fluid, and keep it off the lens edges. Clean from the center outward with gentle circular movements. Store the cloth in a sealed pouch, because a dirty cloth defeats its purpose. Even careful photographers sometimes clean too often. That can create unnecessary contact. A better habit is checking the lens before every session and cleaning only when marks affect the image.
| Cleaning Tool | Primary Function | Suitable Surface | Main Contaminants Removed | Recommended Use | Important Precaution |
|---|---|---|---|---|---|
| Manual Air Blower | Removes loose particles without direct contact | Front and rear lens elements; camera sensor area when designed for that purpose | Dust, sand particles, and loose fibers | First step before wiping any optical surface | Do not use compressed air cans, which can release propellant or excessive pressure |
| Lens Cleaning Brush | Gently sweeps away particles that remain after air cleaning | Lens exterior and, with an appropriate design, optical surfaces | Fine dust and loose lint | Use only when the brush is clean and free of grit | Avoid pressing hard; trapped grit can scratch coatings or glass |
| Microfiber Lens Cloth | Lifts oils and light smudges through gentle wiping | Front and rear lens elements; exterior surfaces | Fingerprints, light grease, and water marks | Use after loose dust has been removed | Keep the cloth clean and dry; avoid household fabrics that may contain abrasive fibers |
| Optical Cleaning Solution | Dissolves oily residue that dry wiping may spread | Exterior lens glass when the solution is labeled for optical equipment | Finger oils, dried smears, and some water-based residue | Apply a small amount to the cloth, not directly onto the lens | Avoid household glass cleaners, solvents, and excess liquid near lens openings |
| Lens Cleaning Tissue | Provides a low-lint surface for controlled wiping | Optical glass when specifically made for lenses | Smudges and cleaning solution residue | Useful when a fresh disposable wiping surface is preferred | Use a new sheet when needed; reused tissue can retain abrasive particles |
| Cotton or Foam Swabs | Cleans narrow gaps and hard-to-reach exterior areas | Lens barrel, filter threads, and mount exterior | Dust, residue, and grime around seams | Use for exterior details rather than pressing into the lens mechanism | Do not allow fibers or liquid to enter the mount, switches, or aperture mechanism |
| Protective Storage Pouch | Keeps cleaning tools separated from dust and contaminants | Cleaning accessories | Dust, moisture, and cross-contamination | Store cloths and tools after they are clean and completely dry | Wash reusable cloths separately and replace them when they become worn or contaminated |
A camera lens cleaning kit is not just an accessory. It controls how dust, oil, and moisture meet delicate optical surfaces. CIPA reported 7.72 million digital cameras shipped worldwide in 2023. That figure reflects a large amount of equipment needing practical maintenance.
Each tool has a different protective role. A rubber air blower removes loose grit without touching the glass. This matters because dry particles can scratch coatings during wiping. A soft lens brush handles stubborn dust around the barrel and filter thread. Use light strokes. Never press hard. Microfiber cloths absorb fingerprints and leave fewer fibers than ordinary fabric. Cleaning fluid helps dissolve skin oil, but only a small amount is needed. Cotton swabs can clean narrow edges, although they may shed fibers. I still find this step easy to rush.
Tips: Inspect the lens under a side light first. Blow before brushing. Apply fluid to the cloth, not directly onto the lens. Keep separate cloths for lenses and camera bodies. Replace any cloth that feels gritty. A protective pouch also prevents the cleaned lens from meeting pocket dust again. CIPA’s shipment statistics show the scale of camera ownership, but they do not measure cleaning mistakes. That gap deserves attention. A kit reduces risk; it cannot replace careful handling.
A camera lens cleaning kit is most useful when dust, fingerprints, or moisture affects your images. I check the front element before important shoots, especially after working outdoors. A bright side light can reveal thin smears that normal room lighting hides. Even small marks may create haze around lamps or bright windows.
Use the kit after visiting beaches, dusty streets, forests, or crowded events. Fine grit can settle around the lens mount and damage surfaces during lens changes. I start with an air blower, never with a dry cloth. Then I use a clean brush and lens-safe solution sparingly. A microfiber cloth should make gentle, single-direction passes. Do not scrub in circles with pressure.
Clean the lens before storing it if moisture or fingerprints remain. This reduces residue and helps prevent stubborn marks later. However, cleaning after every tiny speck is unnecessary. I used to over-clean my lenses, and that habit created more contact than needed. Now I inspect first and clean only when the mark affects shooting or appears clearly under angled light.
A kit also helps after accidental touches. Keep it nearby. It matters most when conditions change quickly. If internal fogging appears, avoid opening the lens or applying heat. Let the equipment return gradually to room temperature, then seek qualified service if the problem remains.
A camera lens collects dust, fingerprints, and tiny oil marks during normal use. A proper cleaning kit gives you controlled tools for each problem. I keep a blower, a soft brush, microfiber cloths, and optical cleaning fluid together. These items reduce careless wiping and help protect delicate coatings. Household tissues can leave fibers. Tap water may contain minerals.
Clean your hands and work in a bright, dust-free place. Remove the lens cap and inspect the glass closely. Use the blower before touching the surface. Keep the nozzle several centimeters away. Never blow with your mouth, because moisture can reach the lens. If dust remains, lightly sweep it with a clean brush. Do not press down.
For fingerprints, place one small drop of fluid on a microfiber cloth, not directly on the lens. Wipe from the center outward with gentle circular movements. Use a fresh section of cloth for each pass. Stop if a mark does not move. Repeated rubbing can spread grease or create fine scratches. I sometimes overestimate how clean a lens looks under warm indoor light. Checking it near a window has corrected that mistake. Avoid cleaning a camera sensor unless you have proper training and suitable tools. A lens kit helps, but patience matters more than pressure.