Leave Your Message

How to Choose Portable Optometry Equipment for Your Clinic

Choosing Portable Optometry Equipment is not simply a matter of buying the lightest instruments. The equipment must support reliable examinations, fit your clinical workflow, and travel safely between rooms or service locations. The World Health Organization’s World Report on Vision (2019) estimates that at least 2.2 billion people worldwide have near or distance vision impairment. It also reports that at least 1 billion cases could have been prevented or have yet to be addressed. These figures underline the need for accessible eye care, though they do not tell clinics which devices to buy. That distinction matters. A portable setup can improve access, but it cannot replace sound clinical judgment or appropriate training.

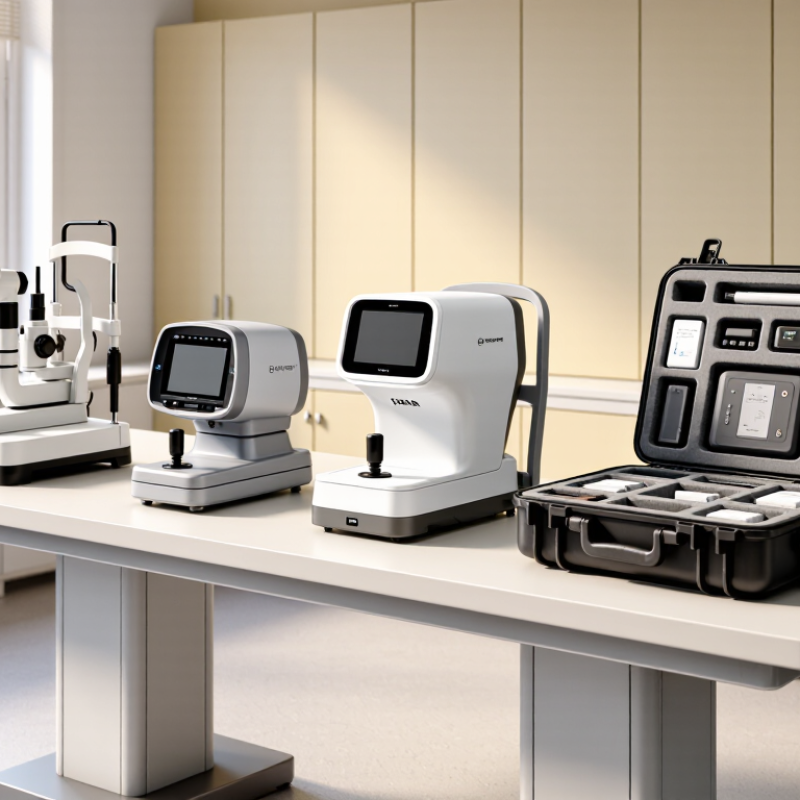
Start with the examinations your clinic performs most often. A handheld slit lamp, portable autorefractor, or tonometer may be useful, but each solves a different problem. Check measurement range, repeatability, battery life, screen visibility, and cleaning requirements. Ask how a device performs in a bright community room, not just a quiet exam lane. Small details count: a secure carrying case, readable controls, and a charger that matches your schedule can prevent frustrating delays. Still, portability is not a cure-all. Some compact instruments may involve trade-offs in features, setup, or workflow, so compare specifications with hands-on demonstrations where possible. This guide explains how to assess clinical needs, usability, durability, and support before investing. A careful choice should make examinations easier to deliver—not merely make the equipment easier to carry.
How to Choose Portable Optometry Equipment for Your Clinic

Assess Your Clinic’s Clinical Needs and Patient Population

A portable kit should reflect the patients you actually see, not an idealized clinic. The World Health Organization’s World Report on Vision (2019) estimates that at least 2.2 billion people worldwide have near or distance vision impairment. Consider whether your clinic mainly provides routine refraction, diabetic eye checks, urgent assessments, or outreach screening. Each need calls for different tools. A compact autorefractor may speed up refraction, while a handheld slit lamp can help assess the anterior eye. Neither replaces careful clinical judgment.

Patient age and mobility matter, too. Older adults may need larger displays, clear instructions, and examinations that minimize transfers between chairs. Pediatric visits can call for child-sized fixation targets and flexible positioning. The U.S. National Eye Institute reports that more than 12 million Americans aged 40 and older have vision impairment, including about 1 million who are blind. That matters. Ask whether your instruments support low-vision assessment, and whether staff can use them consistently.

For mobile services, check battery life, charging options, case weight, and setup time in the rooms you use. A device that is light on paper may feel awkward after several home visits. Confirm that readings are easy to record and that cleaning procedures fit your workflow. Keep it practical. Patient needs vary, and a smaller kit can be more useful than a broad collection of tools. Still, deciding what to leave out deserves regular review.

Identify the Portable Optometry Devices Required

Identify the tests your clinic must perform before choosing portable equipment. The World Health Organization’s 2019 World Report on Vision estimates that at least 2.2 billion people have near or distance vision impairment. At least 1 billion cases could have been prevented or remain unaddressed. That burden makes reliable basic examinations important, especially in outreach settings.

For refraction, consider a handheld autorefractor, retinoscope, and trial lens set. A portable visual acuity chart supports quick baseline checks. Add a handheld slit lamp and tonometer when anterior-eye assessment and intraocular pressure measurement are part of your service. An ophthalmoscope or portable retinal camera can support fundus examination. A compact lensmeter is useful when checking existing spectacles. Keep it simple.

Match the kit to patient volume, power access, and the examinations staff are trained to perform. Check measurement range, calibration needs, battery life, cleaning requirements, and case weight before purchase. A device that is light but difficult to calibrate may slow a busy clinic. I would leave room for manual confirmation; portable readings can vary, and batteries do fail. Not every clinic needs every instrument. Choose around actual services, not an impressive equipment list.

Compare Device Accuracy, Portability, and Ease of Use

Portable optometry equipment should fit the examinations your clinic actually performs. Compare measurement accuracy, repeatability, and the conditions required for reliable readings. A device may list impressive specifications, yet need steady positioning or controlled lighting. Check its calibration schedule and whether results remain consistent across repeated tests. Small differences matter when clinicians track changes over time.

Portability is more than low weight. Consider battery life, case size, charging needs, and how well the instrument handles frequent transport. Try carrying it between rooms with a case and accessories. Does setup take two minutes or ten? That gap can disrupt a busy schedule. Very light, though. A compact device may have a smaller screen or fewer controls, so compare convenience with visibility and function.

Ease of use affects the whole team. Look for clear prompts, readable displays, and controls that work while wearing gloves. Ask staff with different levels of experience to complete a typical measurement, then note where they hesitate. Keep cleaning and data transfer in mind, too. These steps are often overlooked. A hands-on trial can reveal awkward menus or a grip that feels tiring after several patients. I would not choose from a specification sheet alone; real clinic workflows can expose trade-offs that are easy to miss.

How to Choose Portable Optometry Equipment for Your Clinic — Compare Device Accuracy, Portability, and Ease of Use

Device Type Typical Clinical Use Accuracy Considerations Portability Ease of Use Best Fit
Handheld autorefractor Provides an objective estimate of refractive error, often useful for initial assessment and pediatric screening. Results can be affected by fixation, accommodation, pupil size, and patient cooperation. It provides an estimate, not a complete subjective refraction or final prescription. High. Many models are handheld and battery-powered, making them practical for outreach and rooms with limited space. Moderate. Staff need training in patient positioning, fixation, and obtaining repeatable readings. Clinics that need quick objective refraction estimates or screening outside a traditional exam room.
Portable slit lamp Magnified examination of the anterior eye, including the cornea, conjunctiva, and anterior chamber. Image and examination quality depend on illumination, magnification, alignment, and examiner technique. It does not replace every function of a full tabletop slit-lamp setup. High to moderate. Handheld units are compact; stands and accessories may add bulk. Moderate. Consistent alignment and controlled illumination require operator practice. Mobile clinics, bedside examinations, and practices needing a compact anterior-segment assessment option.
Handheld tonometer Measures intraocular pressure as part of glaucoma assessment and follow-up. Readings may differ by measurement method and can be influenced by corneal properties, patient positioning, and technique. Interpret results alongside the full clinical picture. High. Many devices are designed for handheld use and can operate without a dedicated exam table. Moderate. Correct positioning and patient cooperation are important; some measurement methods require topical anesthetic or a disposable probe. Clinics needing flexible intraocular-pressure measurement, including home visits or examinations of patients who cannot sit at a standard instrument.
Portable fundus camera Captures retinal and optic-disc images for documentation, screening, and clinical review. Image quality depends on focus, alignment, pupil size, media clarity, and field of view. Dilation requirements vary by camera design and patient factors. Moderate to high. Handheld systems are easier to transport than tabletop cameras, but may require a phone, tablet, charging equipment, or image-transfer setup. Moderate. Capturing usable images takes practice, especially when fixation or pupil conditions are challenging. Screening programs, remote consultations, and clinics that need portable retinal imaging and digital documentation.
Portable visual acuity chart Measures distance visual acuity using printed, projected, or digital optotypes. Reliable results require standardized optotypes, correct calibration, consistent testing distance, and appropriate room conditions. Digital displays must be configured for the intended viewing distance. High for handheld or tablet-based formats; printed charts are lightweight but still require a suitable testing distance and setup. Easy to moderate. The procedure is straightforward, but consistent instructions, occlusion, and testing conditions matter. Routine acuity checks, outreach visits, and compact examination rooms.
Portable lensmeter Measures the optical power of spectacle lenses, including sphere, cylinder, and axis; some units also measure prism. Results depend on correct lens placement, alignment, instrument calibration, and the lens design being measured. Verify unusual or unexpected readings. Moderate to high. Compact units are transportable, though they are generally less pocket-sized than handheld screening devices. Moderate. Staff need to position the lens correctly and interpret the displayed measurements. Clinics that verify patients’ existing spectacles or provide mobile dispensing and troubleshooting.
Selection note: Compare the intended clinical task, measurement method, repeatability, training needs, cleaning requirements, battery life, and data-transfer options. Portable instruments can support screening and selected examinations, but should be used within their intended purpose and alongside appropriate comprehensive clinical assessment.

Check Compatibility, Power, and Regulatory Requirements

When evaluating portable optometry equipment, match its interfaces to your clinic’s existing devices and records system. Check connector types, data formats, software versions, and whether measurements can be exported without manual re-entry. A device that works only with a particular tablet may slow a busy exam room. WHO’s 2019 World Report on Vision estimated that at least 2.2 billion people have near or distance vision impairment, with at least 1 billion cases preventable or unaddressed. Reliable, compatible equipment helps clinics serve patients efficiently—but the fit must be verified in your own workflow.

Power specifications deserve a hands-on check. Confirm voltage, frequency, plug type, charging time, and battery runtime under realistic use, including screen brightness and wireless connections. Ask how long the unit operates between charges, and test it during a full clinic session. A printed runtime can still mislead. Cold rooms, aging batteries, and accessory loads may reduce it.

Review regulatory requirements for every market where the equipment will be used. Confirm its intended use, labeling, applicable electrical-safety and electromagnetic-compatibility standards, and any local registration obligations. In the United States, FDA requirements depend on device classification and intended use; IEC 60601 standards may also be relevant. For connected devices, FDA’s 2023 cybersecurity guidance recommends managing security risks throughout the product lifecycle. Check the actual documentation with your compliance lead; a supplier’s general assurance is not enough.

How to Choose Portable Optometry Equipment for Your Clinic

Check room fit, device compatibility, power requirements, and applicable regulatory requirements before purchasing.

Room-fit reference: Distance visual acuity testing commonly uses 6 m; a calibrated 4 m setup is another option. Near acuity is commonly assessed at about 40 cm. Confirm the test distance and chart calibration instructions for the specific equipment.

Before purchase: Confirm that the device works with your clinic’s existing systems, check battery runtime and local mains input requirements, and verify applicable market authorization and electrical and optical safety requirements in your jurisdiction. IEC 60601-1 and ISO 15004-2 may be relevant, depending on the device and its intended use.

Evaluate Costs, Training, and Ongoing Maintenance

Portable equipment should be compared by its full operating cost, not its purchase price. Include calibration, replacement batteries, protective cases, consumables, shipping, and service access in your budget. A low-cost instrument may become expensive if calibration requires repeated courier trips. There is no reliable universal price benchmark; request itemized quotes and confirm what routine servicing includes.

Training affects both clinic flow and measurement quality.

WHO’s World Report on Vision (2019) estimates that at least 2.2 billion people have near or distance vision impairment, with at least 1 billion cases preventable or unaddressed. That global figure is not a forecast for your clinic, but it underscores the importance of accessible eye-care workflows.

Before buying, have staff practise setup, cleaning, calibration checks, and secure packing. WHO’s Medical Equipment Maintenance Programme Overview (2011) recommends planned inspection and preventive maintenance. Build these tasks into a named staff member’s schedule. One trade-off is easy to miss: compact equipment saves space, but its cases and charging needs still need room.

Tips: Test the kit in a real exam room. Time setup and pack-down. Keep a simple log for faults, calibration dates, and battery changes. If staff need lengthy instructions, revisit the training plan.